How to Use 3D Father’s Day Layered Decor Laser Cut in Your Creative Workflow
When it comes to personalizing spaces for special occasions, the 3D Father’s Day Layered Decor Laser Cut digital design stands out as a versatile and thoughtful choice. Whether you're an artist, DIY enthusiast, or someone looking to create a meaningful gift, this product offers a unique opportunity to craft something original with minimal effort. As a digital asset, it seamlessly integrates into modern creative workflows, allowing users to bring heartfelt designs to life using laser cutting technology.
Understanding the Product and Its Purpose
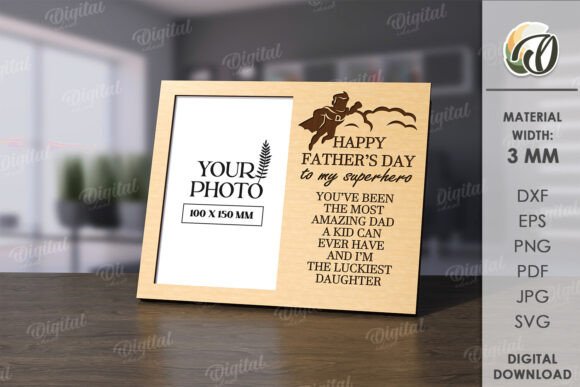
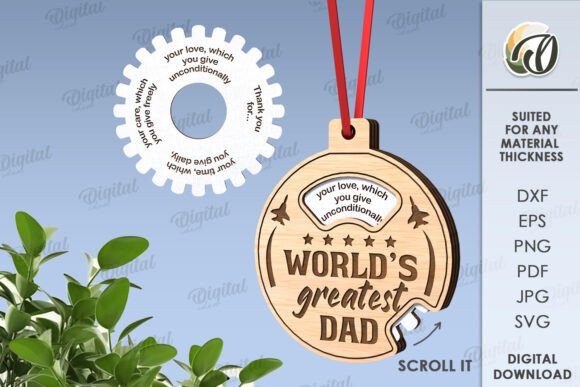
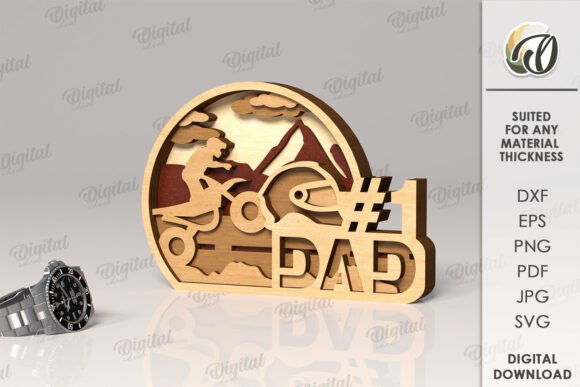
The 3D Father’s Day Layered Decor Laser Cut is not a physical item but rather a set of high-quality digital files designed for laser cutting machines. Upon purchase, you receive a zip folder containing one design in SVG, DXF, EPS, PDF, JPEG, and PNG formats. These files serve as blueprints for creating layered decorations that can be assembled into 3D wall art, centerpieces, or personalized gifts.
It's important to note that while the product includes visual examples to inspire your project, those are just placeholders. The real value lies in the digital files you get — they’re ready to be imported into design software or directly into laser cutting systems, depending on your setup. This makes it ideal for anyone who already owns a laser cutter or has access to one through a local workshop or online service.
Planning Your Project: Before You Start
Before importing the 3D Father’s Day Layered Decor Laser Cut design into your system, take time to plan how you’ll use it. Ask yourself:
- What material will I cut it from? (e.g., wood, acrylic, cardboard)
- Do I have the necessary tools or access to a laser cutting service?
- Where will the final piece go? Is it for home decor, office space, or a gift?
These considerations help determine the scale, color scheme, and assembly method best suited for your intended outcome. For instance, if you're making a gift, you might want to keep the layers thin and lightweight for easy transport. If it's destined for a permanent display, durability becomes more important.
Integration Into Your Design Process
Once you’ve decided on your materials and purpose, the next step is integrating the design into your workflow. Most laser cutting projects follow a similar path: design → prepare → cut → assemble. Here’s how the 3D Father’s Day Layered Decor Laser Cut fits in:
- Select the Right File Format: Depending on your software or machine, choose the most compatible file type. SVG and DXF are commonly used for vector-based editing, while PDFs may be useful for layout previews.
- Edit and Customize: Open the file in your preferred design program (such as Adobe Illustrator, Inkscape, or CorelDRAW) to make any adjustments. Resize the design, change colors, or add text to personalize it further.
- Prepare for Cutting: Set up your laser cutter with the correct settings for your chosen material. Ensure the design is properly aligned and scaled to match the size of your workspace or frame.
- Cut and Assemble: After cutting all layers, carefully sort them based on their depth or order. Use glue, magnets, or clips to assemble the 3D structure, following the included instructions or your own creative vision.
Using It as Part of a Larger Creative Task
This digital product doesn’t exist in isolation. It can enhance various creative tasks and projects, such as:
- Interior Design Projects: Incorporate the 3D design into a larger room renovation or decor overhaul. Use it as a statement piece or part of a themed collection.
- Event Planning: Add a custom touch to Father’s Day celebrations by including the layered decor as part of table settings, signage, or photo backdrops.
- Gift Making: Combine the laser-cut design with other elements like LED lighting, shadow boxes, or framed glass to create a memorable present.
- Business Branding: Entrepreneurs and small business owners can use the design to promote their services during the holiday season, especially if they offer laser cutting or custom decor solutions.
Each of these scenarios benefits from the flexibility of the 3D Father’s Day Layered Decor Laser Cut. By treating it as a component within a broader creative task, you can maximize its impact and tailor it to fit specific needs or aesthetics.
Workflow Examples and Practical Tips
Here are a few practical ways to implement the 3D Father’s Day Layered Decor Laser Cut into different workflows:
Example 1: DIY Home Decor Enthusiast
If you enjoy crafting at home, start by downloading the files and opening them in a vector editor. Adjust the size to fit your available space and then test print the design on paper before moving to your actual material. This helps avoid costly mistakes. Once satisfied, load the edited file into your laser cutter and proceed with cutting each layer individually. Store the pieces in labeled folders until you’re ready to assemble them.
Example 2: Freelance Designer Offering Custom Work
As a designer, you can use this template to create bespoke Father’s Day gifts for clients. Import the design into your workflow, customize it with client preferences (like adding names or changing colors), and send the files to a laser cutting service. Then, handle the final assembly or provide clear instructions for the client to complete it themselves. This approach streamlines production and ensures consistent quality across multiple orders.
Example 3: Educator or Workshop Leader
Use the 3D Father’s Day Layered Decor Laser Cut in a classroom setting to teach students about laser cutting, spatial design, and creative expression. Provide the digital files and guide them through the process of modifying and assembling the pieces. This encourages hands-on learning and fosters creativity in a structured environment.
Compatibility and Quality Control
One key aspect to consider is compatibility. Ensure that your laser cutting software supports the file types provided. If not, convert the files using reliable conversion tools or consult your software’s documentation for guidance. Also, verify that the resolution and scaling in the vector files are suitable for your machine’s capabilities.
For quality control, always preview the design on screen and do a dry run with scrap material before committing to the final cut. This allows you to catch alignment issues, scaling errors, or potential weak points in the structure. Keeping a checklist of steps — from file verification to material testing — can significantly reduce the risk of mistakes and improve the final outcome.
Organization and Efficiency in Long-Term Use
If you plan to reuse the 3D Father’s Day Layered Decor Laser Cut design or similar templates in future projects, maintaining an organized digital library is essential. Create folders for each design type, include notes about modifications made, and store both the original and edited versions for reference.
Efficiency also plays a role when working with multiple layers. Label each layer clearly after cutting and arrange them in the order they should be assembled. Some creators find it helpful to number the pieces or write brief instructions on the back of each layer. This saves time and reduces confusion, especially if others are helping with the build.
Expanding the Possibilities with Additional Assets
While the 3D Father’s Day Layered Decor Laser Cut provides a solid foundation, combining it with other assets can unlock even more potential. Consider pairing it with:
- Lighting elements for added visual appeal
- Wood stains or paint to match your interior style
- Custom frames or mounts for secure placement
- Other SVG or DXF files for complementary designs
By treating the design as a starting point rather than a final product, you open up endless opportunities for customization and integration. This mindset is particularly valuable for professionals aiming to deliver unique, tailored results to clients or hobbyists looking to refine their creative output.
Consistency and Reproducibility
Whether you're creating one piece or many, consistency is crucial. When working with laser-cut designs, ensure that each layer is printed or cut under identical conditions to maintain uniformity. For businesses, this could mean standardizing file formats, material thicknesses, and assembly techniques across all projects. A repeatable process not only improves reliability but also builds trust with customers who expect high-quality results every time.
Additionally, document your workflow so you can replicate it in the future. Record settings used for cutting, notes on assembly challenges, and any design tweaks you made. This creates a reference that can be shared with team members or used in upcoming projects, saving time and ensuring smooth execution.
Final Thoughts on Implementation
Integrating the 3D Father’s Day Layered Decor Laser Cut into your creative process is a matter of planning, preparation, and adaptability. Its digital nature means there’s no inventory to manage, and its layered format allows for both simplicity and complexity depending on your goals. From quick weekend crafts to professional commissions, this design serves as a flexible and inspiring resource.
Remember, the photos included with the product are for inspiration only. Don’t feel limited by them — experiment with different materials, finishes, and layouts to make the design uniquely yours. Think about how it can complement your existing work or elevate a new project, and let that drive your implementation strategy.
If you have questions about file compatibility, assembly methods, or anything else related to the 3D Father’s Day Layered Decor Laser Cut, don’t hesitate to reach out. Clear communication ensures that you get the most out of your purchase and avoids unnecessary delays in your creative process.
Happy shopping and happy creating! With the right approach, this design can become a standout feature in your latest project, whether it’s for your own space or a thoughtful gift for someone special.