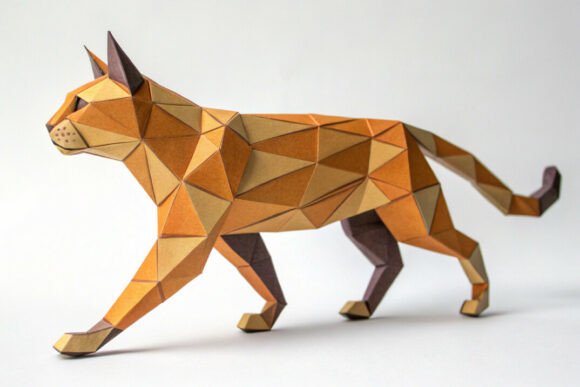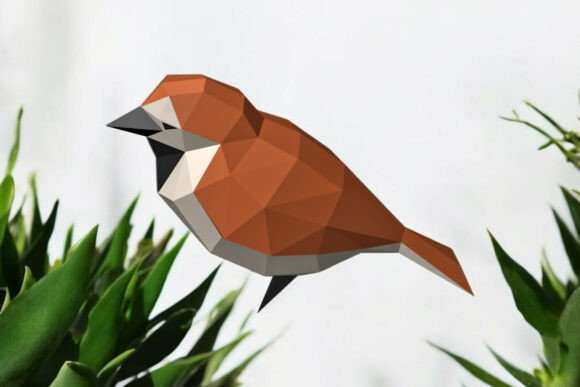
Sparrow Bird - 3d Papercraft
The Sparrow Bird - 3D Papercraft is a creative and engaging project that brings the charm of a simple bird to life through paper-based modeling. Designed for those who enjoy hands-on crafting, this papercraft model is ideal for both hobbyists and professionals looking to add a personal or artistic touch to their workspaces or projects. The assembled size of the model is 15 x 9 x 21 cm, making it compact yet detailed enough to impress.
What You’ll Get with the Digital Files
When you purchase the Sparrow Bird - 3D Papercraft digital files, you receive a comprehensive set of materials in multiple formats: PDF, DXF, EPS, PNG, and JPG. These files ensure compatibility with various tools and workflows, whether you're using them for personal enjoyment or professional purposes like event decoration, branding, or educational activities.
Essential Tools and Materials for Assembly
To assemble your Sparrow Bird papercraft, you will need a few basic but essential tools:
- A colored printer for high-quality prints
- Glue suitable for cardstock
- Scissors for cutting out parts
- A craft knife for precision cuts
- A scorer or bone folder to create clean folds
- A non-working ballpoint pen for scoring lines without tearing the paper
- A ruler for measuring and guiding cuts
- A4 or letter-sized cardstock paper for durability
Having these items on hand ensures a smooth and efficient assembly process. It’s also helpful to organize your workspace before beginning to avoid confusion and maintain consistency throughout the build.
Assembly Time and Process Overview
On average, assembling the Sparrow Bird takes around three hours, depending on your experience level and how carefully you follow each step. This time includes printing, cutting, scoring, folding, and gluing all components. Beginners may find it beneficial to break the process into smaller sessions, especially if they’re juggling other tasks or responsibilities.
The process begins by printing the templates full-size on A4 cardstock. Once printed, use your scissors or craft knife to cut out each piece precisely. After cutting, score the fold lines using a scorer or a non-working ballpoint pen along with a ruler. This helps create crisp bends and flaps. Finally, glue the pieces together following the instructions provided in the PDF file. Each flap is designed to fit seamlessly, ensuring structural integrity and visual appeal.
Integration into Creative Projects and Workflows
The Sparrow Bird - 3D Papercraft can serve as more than just a standalone decorative item. It fits well into broader creative processes such as product design, packaging prototyping, or even marketing campaigns. For example, an educator might use the model to teach geometry or symmetry in a classroom setting, while a marketer could incorporate it into a themed event or brand display to enhance visual storytelling.
Before a Project
Using papercraft models like the Sparrow Bird during the pre-planning phase of a project allows creators to visualize spatial arrangements and design elements. Architects, for instance, might use similar models to explore layout concepts or present ideas to clients in a tangible format. The same applies here—building the bird can help refine your understanding of form, structure, and material limitations before moving to more complex builds.
During a Task
Incorporate the Sparrow Bird into your workflow as a physical reminder or motivational symbol. Placing it near your desk can spark creativity and remind you of the value of attention to detail. If you're working on a team project, consider creating multiple birds to distribute among members as part of a collaborative milestone or reward system.
After Completion
Once assembled, the Sparrow Bird can be used as a finished product. It’s suitable for gifting, showcasing in exhibitions, or integrating into office decor. Its small size makes it easy to store or display, and its craftsmanship adds a unique, handmade quality to any space.
Practical Tips for Smooth Assembly
Here are a few tips to help streamline the assembly process:
- Print Carefully: Always check the print settings to ensure the templates are printed at full scale. Misprints due to incorrect scaling can lead to misaligned pieces and frustration.
- Use Quality Cardstock: Opt for thicker cardstock (around 180–210gsm) to give the model a sturdier finish and prevent warping after gluing.
- Score Before Folding: Scoring the fold lines beforehand helps prevent cracking and ensures cleaner, sharper bends.
- Work in Sections: Instead of attempting to assemble everything at once, tackle one section at a time. This reduces errors and keeps the model organized.
- Store Flaps Temporarily: When not in use, keep cut-out flaps in labeled envelopes or folders to avoid mix-ups later in the process.
- Use Appropriate Glue: Choose a glue that dries clear and quickly, like white craft glue or double-sided tape for delicate areas.
Enhancing Usability Across Different Platforms
The digital files included with the Sparrow Bird offer flexibility for different applications. For instance, the DXF and EPS files are compatible with vector editing software like Adobe Illustrator or CorelDRAW, allowing designers to customize the template colors or integrate it into larger graphic designs. Meanwhile, the PNG and JPG files are great for digital presentations or promotional content where a flat image is needed.
If you plan to modify the design, having access to vector files means you can adjust dimensions or combine elements with other papercraft templates. This is particularly useful for entrepreneurs or small business owners who want to create branded merchandise or custom gifts.
Workflow Examples and Use Cases
Here are some practical examples of how the Sparrow Bird - 3D Papercraft can be integrated into daily routines or professional workflows:
- Event Planning: Assemble several birds ahead of time and use them as centerpieces or signage for workshops, product launches, or art exhibitions.
- Marketing Campaigns: Create a branded version of the model using the editable files and include it in client gift boxes or as a sample for promotional materials.
- Office Organization: Build one bird per team member and place them on desks as subtle reminders of teamwork or company values.
- Personal Development: Set aside time to complete the model as part of a mindfulness or productivity routine, helping you take a break from screen-based tasks.
- Teaching Tool: Use the model to demonstrate engineering principles, design thinking, or even biology in a classroom environment.
Factors to Consider for Long-Term Use
While the Sparrow Bird is a relatively simple papercraft project, certain factors should be considered to maximize its long-term usability and effectiveness:
- Preparation: Ensure you have all required tools and materials ready before starting. This minimizes interruptions and maintains momentum.
- Compatibility: Check the file formats against your software and printer capabilities to avoid technical issues. Most modern printers support A4 sizes and color printing, but confirm before purchasing.
- Organization: Keep the digital files and physical components in a structured way. Label folders and envelopes clearly if building multiple units or modifying the design.
- Efficiency: Break down the assembly steps into logical phases to save time and reduce errors. Start with the largest pieces and gradually move to smaller details.
- Consistency: Maintain consistent pressure when scoring and folding to ensure uniformity across all units if you plan to mass-produce them.
- Quality Control: Inspect each piece after cutting and before gluing. Small mistakes early on can lead to significant issues later.
Combining with Other Resources and Methods
The Sparrow Bird - 3D Papercraft doesn’t exist in isolation. It works best when combined with other resources and methods:
- Design Software: Use Adobe Illustrator or Inkscape to tweak the design before printing, adding logos or text to personalize it.
- Cutting Machines: If available, a Cricut or Silhouette machine can automate cutting, improving accuracy and speed.
- Online Tutorials: Follow along with papercraft tutorials on YouTube or instructional blogs for guidance, especially if you're new to the medium.
- Community Feedback: Share your finished model online or in local crafting groups to get feedback and inspiration for future builds.
By integrating these complementary tools and techniques, you can elevate the outcome and make the most of your investment in the digital files.
Realistic Expectations and Outcomes
It's important to approach the Sparrow Bird - 3D Papercraft with realistic expectations. While it offers a satisfying result, it requires patience and precision. Don’t expect perfection on the first try—especially if you're new to papercrafting. Instead, focus on learning the process and enjoying the journey. Over time, your skills will improve, leading to better outcomes and faster assembly times.
Additionally, remember that the final product is fragile. Handle it gently and avoid placing it in high-traffic areas unless it’s protected. Consider sealing it with a light coat of matte varnish for added durability, especially if it's going to be displayed publicly.
Conclusion
The Sparrow Bird - 3D Papercraft is more than just a fun DIY project—it’s a versatile asset that can be woven into various creative, educational, or professional contexts. Whether you're an entrepreneur designing a campaign, an educator preparing a lesson, or simply someone looking for a meaningful activity, this papercraft model provides a rewarding challenge and a beautiful result. With the right tools, preparation, and mindset, you can successfully bring the bird to life and use it effectively in your workflow.
If you encounter any difficulties or have questions about the process, don’t hesitate to reach out. Many creators share their experiences online, and there are often communities willing to assist. Embrace the process, stay organized, and let the Sparrow Bird become a meaningful part of your creative journey.